
Introduction to Composting and Its Benefits
Composting is a natural process of recycling organic matter, such as leaves and food scraps, into a valuable fertilizer that can enrich soil and plants. This process not only reduces waste that would otherwise end up in landfills but also allows gardeners to create nutrient-rich soil amendments for their gardens. By converting everyday organic waste into compost, individuals can take a significant step toward more sustainable living. A DIY compost bin is an excellent starting point for anyone looking to embark on this eco-friendly journey.
The benefits of composting stretch beyond simply reducing waste. Compost is an amazing substance that improves soil structure, provides essential nutrients for plant growth, retains moisture, and suppresses plant diseases. These capabilities ensure that gardens flourish with minimal need for chemical fertilizers. Whether you’re a seasoned gardener or a beginner, creating your own compost bin will contribute greatly to your gardening success, as well as provide an easy and efficient way to recycle organic waste right in your backyard.
Choosing the Right Location for Your Compost Bin
Selecting the right location for your compost bin is crucial for efficient composting and convenience. Ideally, the spot you choose will get a good amount of sunlight, as this helps speed up the decomposition process by maintaining warmer temperatures. However, too much direct sun exposure can dry out the materials too quickly, so partial shade is often best.
Proximity is another important factor to consider. You’ll want your compost bin to be easily accessible from your kitchen so that disposing of food scraps is convenient. However, placing it too close to your home could attract unwanted pests, depending on what you’re composting. Additionally, consider ease of access for turning the pile and harvesting the compost, which requires space for tools like a garden fork or shovel.
Finally, proper drainage is essential to prevent your compost bin from becoming waterlogged. Avoid placing the bin on a concrete slab or any area where water can accumulate. A well-drained soil area is ideal, as it allows any excess moisture to seep into the ground. Once the right location is secured, the composting process will become a seamless part of your routine.
Essential Materials Needed to Build a Compost Bin
Building a compost bin from scratch doesn’t require much in the way of materials, but it’s important to gather the correct essentials to create an effective and durable structure. Here’s a quick list of items you’ll need:
- Wooden Pallets or Planks: These can be used to create the sides and base of your compost bin. Make sure they are untreated to reduce the risk of chemical contamination.
- Screws and Hinges: These will keep your bin structure secure. Hinges are particularly handy if you want a lid for your bin.
- Chicken Wire or Mesh: Useful for lining the sides of your bin to improve aeration and keep smaller pests out.
- Garden Stakes or Metal Rods: These will reinforce the corners of your bin and ensure the structure remains stable over time.
Additionally, you may need some basic tools, including:
- A drill or screwdriver
- A saw for cutting wood to size
- Measuring tape
These materials are usually affordable and can be sourced from hardware stores, online, or possibly recycled from other projects. Before you start building, ensure all materials are safe for use near edible plants, especially if you’re using recycled materials.
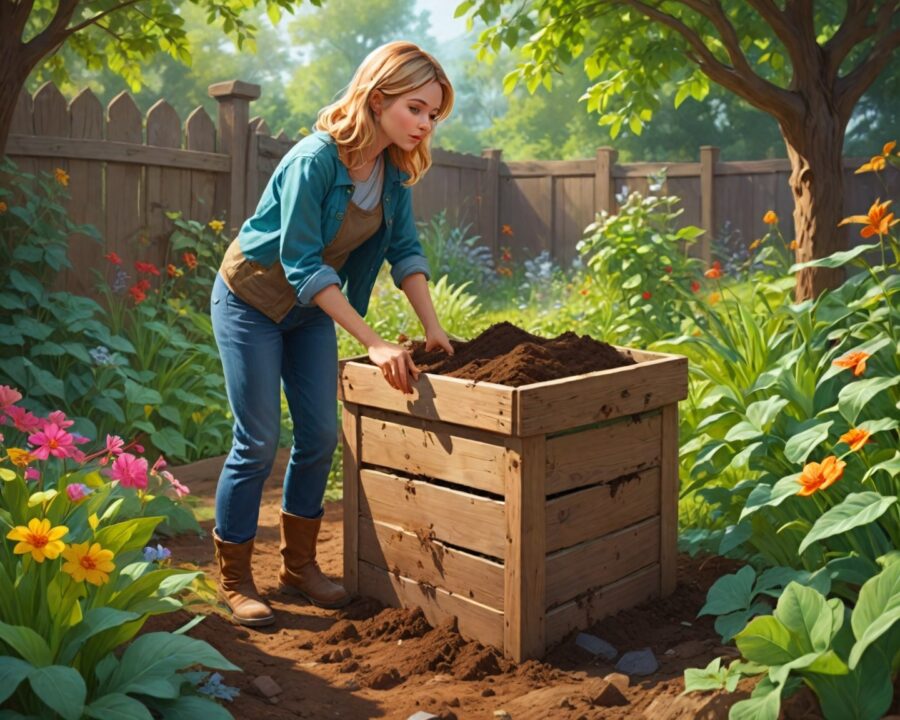
Step-by-Step Guide to Constructing a Compost Bin
Creating your own compost bin can be a rewarding DIY project. Here’s a simple step-by-step guide to help you construct a bin that suits your garden needs.
Step 1: Select Your Design
Decide on the type of compost bin that fits your garden space and needs. The most common designs are single-bin, multi-bin, and tumbling compost bins. For this guide, we’ll focus on a basic single-bin system, which is an excellent choice for beginners and small gardens.
Step 2: Prepare Your Materials
Using the materials listed earlier, gather all required items and tools. If you’re using wooden pallets, there’s minimal cutting required. For planks, cut the wood to create four sides of equal length, allowing for easy assembly in the chosen location.
Step 3: Initial Assembly
- Build the Base: Lay out two pieces of wood parallel to one another on the ground where the bin will sit. These will form the foundation of your bin. Secure them with screws for stability.
- Erect the Side Walls: Take another two wooden planks (or pallets) and attach them upright on opposite ends of your base. Ensure they are straight and secure by using additional screws.
- Create the Backwall: Connect another pair of wooden pieces between the erected sides to form the back wall. Again, ensure the structure is sturdy and capable of holding material weight.
Step 4: Add the Front and Lid
- Front Panel: You can either leave the front open for easy access or attach a removable front panel using hinges for a more controlled composting environment.
- Optional Lid: A lid is useful for keeping rain and pests out. To make one, attach a fourth piece of wood over the top using hinges, allowing it to open and close easily.
Step 5: Install Lining
Use chicken wire or garden mesh on the inside of your compost bin walls. This lining will help keep smaller pests out while still allowing good air circulation.
Step 6: Final Checks
With construction complete, give your compost bin a final once-over. Check for rough edges, and make sure no untreated wood is exposed that’ll touch the compost material directly. If needed, sand down any splinters or sharp edges.
Tips for Maintaining and Managing Your Compost Bin
Setting up a compost bin is just the beginning; maintaining it is just as crucial to its effectiveness. Here are some tips to ensure your compost bin remains efficient:
-
Layering Material: Start with a layer of coarse materials like twigs or straw at the bottom for drainage. Then add alternating layers of green (nitrogen-rich) and brown (carbon-rich) materials to balance the composting process.
-
Balance Moisture: Your compost should feel like a damp sponge. If it’s too dry, decomposition will slow down. Add water with a watering can to maintain moisture levels. Conversely, if it’s too wet, add more brown materials to absorb excess moisture.
-
Turn the Pile Regularly: Aeration is key to a quick and odorless composting process. Use a pitchfork or shovel to mix the materials every few weeks, ensuring that oxygen reaches the core of the pile.
By following these maintenance tips, you’ll help ensure your compost breaks down efficiently into a nutrient-rich soil amendment for your garden.
Common Mistakes to Avoid When Composting
Even the most diligent composters can make mistakes. Here are some common pitfalls to avoid to ensure a successful composting experience:
-
Wrong Material Balance: Too much green material can lead to a smelly pile due to excess nitrogen, while too much brown can result in slow decomposition. Balance is crucial.
-
Adding the Wrong Waste: Certain organic items don’t belong in a compost bin, such as dairy products, oils, and meats, which can attract pests and cause odors.
-
Ignoring Your Bin: Composting is not a passive process. Without regular turning and moisture management, your compost may become compacted, leading to an oxygen-deprived environment that messes up the decomposition process.
Avoiding these missteps will keep your bin in top form and yield high-quality compost for your garden endeavors.
How to Troubleshoot Composting Issues
Sometimes, despite your best efforts, composting can hit a snag. Here are solutions to common issues:
-
Foul Odor: A strong smell often indicates too little oxygen or too much moisture. Remedy this by turning the compost more frequently and adding dry brown materials.
-
Slow Decomposition: If the compost seems inactive, the issue could lie with the material balance. Try adding more green materials or increase moisture if it’s too dry.
-
Pest Attraction: If pests are drawn to your compost, revisit what you’re putting in. Ensure no cooked foods are in your compost bin and use a lid if necessary.
By identifying these problems early and making minor adjustments, you can easily get your composting back on track.
Benefits of Using Compost in Your Garden
The payoff for diligent composting is undeniable once you start applying it to your garden. Here are several benefits you’ll enjoy:
-
Improved Soil Structure: Compost loosens clay soils and improves sandy soils, making it easier for plant roots to spread and access nutrients.
-
Nutrient Richness: As compost breaks down, it releases essential nutrients like nitrogen, phosphorus, and potassium naturally, reducing the need for chemical fertilizers.
-
Water Retention: A garden amended with compost holds water better and helps plants resist drought conditions, making your watering efforts more efficient.
These benefits lead to vigorous plant growth, healthier plants, and ultimately more bountiful harvests.
Creative Ideas for Upcycling Materials for Your Compost Bin
Building a compost bin can also be an exercise in creativity, especially when it comes to upcycling. Here are some inventive ideas to consider:
-
Old Furniture: An old dresser can be repurposed into a compost bin by removing drawers, stacking them, and adding ventilation.
-
Shipping Pallets: These are often available for free and can create a sturdy and functional bin with minimal tweaking.
-
Broken Crates: Wooden crates can be stacked and fixed together as a quick and easy composting solution.
These upcycled materials not only provide a cost-effective building approach but also emphasize your commitment to sustainability.
Next Steps: Expanding Your Composting Efforts at Home
As your interest and experience in composting grow, you might be inspired to expand your activities beyond a single bin. Consider the following steps:
-
Multiple Bins: Best for big gardens, having a series of compost bins means you can have various compost at different stages of decomposition, always having fresh compost ready.
-
Worm Composting: Adding a worm bin can speed up the decomposition process, perfect for compact urban gardens.
-
Community Composting: Engage with neighbors to start a community composting program, sharing resources and rewards.
These efforts can amplify the benefits of composting, creating a true cycle of waste reduction and soil improvement in your local ecosystem.
| Material | Function | Source | Cost ($) |
|---|---|---|---|
| Wooden Pallets | Bin Structure | Hardware/Recycling | Low |
| Chicken Wire | Aeration & Pest Control | Garden Store | Moderate |
| Garden Stakes | Structural Support | Hardware Store | Low |
| Screws & Hinges | Assembly | Hardware Store | Low |
Frequently Asked Questions
What should I not put in my compost bin?
Avoid adding meats, dairy products, oils, and diseased plants, as these can attract pests and create odor problems.
How often should I turn my compost?
Turn your compost every two to three weeks to aerate it and speed up the decomposition process.
Can I compost in winter?
Yes, composting is a year-round activity. In winter, the process slows down, but it continues. Insulating your bin can help maintain heat.
How do I know when compost is ready to use?
Compost is ready when it looks dark and crumbly and smells earthy. You should not be able to identify the original waste materials.
Why is my compost bin not heating up?
This may be due to insufficient green materials or moisture. Adding water or grass clippings can help.
Is there a benefit to having multiple compost bins?
Yes, multiple bins allow for continuous processing of materials at various stages, ensuring a constant supply of ready-to-use compost.
Can I compost cooked food scraps?
It’s generally not recommended to compost cooked foods, as they can attract pests and interfere with the composting process.
How can I speed up the composting process?
To expedite composting, maintain the right balance of green and brown materials, add water if needed, and turn the pile regularly.
Recap
From choosing a suitable location to assembling your bin from easily sourced materials, setting up a DIY compost bin requires a structured approach. After assembly, proper maintenance techniques like balancing moisture and aeration are key to effective composting. Avoiding common mistakes such as improper waste balance and pest management further ensures success in generating usable compost. For those who wish to explore further, creative upcycling and expanding methods like worm composting offer exciting next steps for committed composters.
Conclusion
Building a DIY compost bin is not only an environmentally responsible decision but also a practical enhancement to any gardening effort. With a conscious choice of materials, careful maintenance, and a proactive approach, homemade compost can lead to healthier garden soils and a noticeable reduction in household waste. By transforming organic waste into black gold, you’ll unlock a sustainable loop of waste-to-resource that benefits your garden and the planet alike.
As gardening enthusiasts continue to seek methods to improve their practice and reduce their carbon footprint, composting stands out as a simplistic yet highly effective solution. With the right knowledge and a hands-on approach, anyone can turn kitchen scraps and garden waste into a potent soil amendment, enriching their garden one compost pile at a time.